Step-by-Step Approaches to Getting Flawless Drywall Fixing and Setup
Attaining remarkable drywall fixing and setup calls for a systematic technique. It involves recognizing the various types of drywall and the devices necessary for the job. Correct location prep work is important before beginning any job. Drywall Installation Ogden Utah. Each action, from patching openings to mounting brand-new sheets, needs focus to information. The process does not end with setup; finishing methods are vital for a sleek look. The next steps will guarantee a seamless result, yet just what do they entail?
Recognizing Drywall Kind and Devices Needed
The installment tools are similarly important. An utility knife is crucial for reducing drywall sheets, while a drywall saw can aid in making precise cuts for outlets or components. T-squares assure accurate measurements, and drywall screws or nails secure the panels to wall surface studs. In addition, a drywall lift can facilitate the installment of big sheets, lessening physical stress. Knowledge with these devices and types considerably contributes to the efficiency and high quality of drywall tasks.
Preparing the Area for Repair Work or Setup
Preparing the location for drywall fixing or setup is essential to ensure a smooth and efficient procedure. The surrounding area ought to be removed of furniture and other obstacles to provide ample functioning room. This not only guarantees safety and security but also stops damage to items. Next off, it is necessary to cover the flooring with ground cloth to catch any type of particles or dirt produced during the job.
Furthermore, the walls must be inspected for any kind of loose paint or wallpaper that may disrupt adhesion. Removing these elements produces a tidy surface area for the brand-new drywall. Prior to beginning, it is advisable to shut off power to electric outlets or fixtures in the location. Making certain sufficient illumination in the workspace will better improve visibility and focus throughout the fixing or installation procedure. Interior Painting. By diligently preparing the area, one prepares for a successful drywall job
Step-by-Step Refine for Patching Holes
:max_bytes(150000):strip_icc()/SPR-solutions-to-common-drywall-problems-p2-4120949-not-on-stud_53719-051c5226ba8f478086c3994975acf8c9.jpg)
Patching holes in drywall needs an organized method to ensure a seamless repair work. The primary step involves examining the dimension of the opening. For tiny openings, a patching substance might suffice, while bigger openings demand a patch. Next off, the damaged area ought to be cleansed and prepared by removing any kind of loosened particles.
For little holes, using spackling substance with a putty knife is recommended, smoothing it over the hole and feathering the sides. Once completely dry, sanding the location guarantees a smooth coating. For larger holes, a drywall spot need to be reduced to size, positioned over the opening, and secured with screws. After installing the spot, the exact same spackling procedure is repeated, followed by fining sand.
Lastly, the patched area has to be topped and repainted to match the surrounding wall surface. This careful process guarantees a specialist look and expands the life expectancy of the repair service.
Setting Up New Drywall Sheets: A Comprehensive Overview
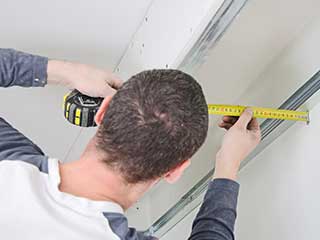
Installing brand-new drywall sheets requires mindful preparation and implementation to assure a visually appealing and sturdy finish. The area should be measured properly to establish the number of sheets needed. It is vital to pick the right thickness, generally 1/2-inch for interior walls and 5/8-inch for ceilings or fire-rated applications.
Next, the studs or structure ought to be examined for any type of irregularities, making certain they are straightened and appropriately spaced. When putting the drywall sheets, they should be positioned horizontally to decrease seams and enhance architectural stability. A drywall lift can be advantageous for overhanging installations.
Attaching the sheets with drywall screws at proper periods makes specific a safe setup. It is very more info important to countersink the screws somewhat below the surface to plan for the finishing procedure. Adhering to these standards will certainly cause a solid structure, ready for the next actions in drywall finishing.
Completing Touches: Taping, Mudding, and Fining Sand Strategies
As soon as the drywall sheets are securely fastened, the focus changes to the finishing touches that will provide a polished appearance. This procedure begins with taping, using either paper or fiberglass harmonize tape to cover the seams between sheets. The tape assures a smooth shift, decreasing the risk of splitting. Following taping, mudding is crucial; a joint compound is applied over the tape to fill up gaps and create a seamless surface. Typically, several layers are needed, each one feathered out additionally than the before minimize presence.
After adequate drying out time, fining sand is the last action in attaining a remarkable finish. A fine-grit sandpaper is made use of to smooth the dried out compound, guaranteeing there are no bumps or imperfections. Interest to information throughout this phase is considerable, as it substantially impacts the general look of the wall surface. The end result should be an even, professional-looking surface area prepared for priming and painting.
Regularly Asked Concerns
How Do I Choose the Right Drywall Thickness for My Job?
To select the ideal drywall thickness, take into consideration the task's objective, area, and structural requirements. Criterion thicknesses include 1/2-inch for general usage and 5/8-inch for fire-rated applications, making sure sturdiness and compliance with structure codes.

Can I Install Drywall Over Existing Drywall?
Yes, mounting drywall over existing drywall is possible. Nonetheless, it is vital to guarantee the underlying surface is safe and complimentary from damage. Appropriate attachment and consideration of density are essential for an effective installment.
What Are the Finest Practices for Drywall Disposal?
The very best techniques for drywall disposal consist of recycling when feasible, making use of local waste administration solutions, and adhering to standards for dangerous products if applicable. drywall contractor. Correctly securing and classifying waste warranties conformity and safety during disposal
How much time Should I Await Mud to Dry Before Fining sand?
Typically, one must wait 24-hour for drywall mud to completely dry before sanding. However, drying out time can vary based on moisture and temperature level, so inspecting for a firm texture is suggested prior to continuing.
Are There Eco-Friendly Drywall Options Available?
Yes, environmentally friendly drywall choices are readily available. These choices often make use of recycled materials, low-VOC adhesives, and sustainable manufacturing methods, minimizing environmental effect while giving efficient insulation and sturdiness for numerous building and remodelling projects.
An energy blade is vital for cutting drywall sheets, while a drywall saw can aid in making exact cuts for components or electrical outlets. Preparing the area for drywall repair work or installation is important to guarantee a efficient and smooth procedure. Covering openings in drywall calls for a systematic approach to guarantee a seamless repair service. Setting up brand-new drywall sheets requires cautious preparation and execution to assure a strong and aesthetically attractive surface. Yes, installing drywall over existing drywall is feasible.